
Showing posts with label Scrapbook Nook. Show all posts
Showing posts with label Scrapbook Nook. Show all posts
Friday, March 4, 2011

Thursday, March 3, 2011
I'm on You Tube!
I've jumped on the You Tube bandwagon. Here's my first ever video, part one. Please keep the laughter to a dull roar, okay?
Monday, February 28, 2011
Scrappin' Fool
So one thing I have been doing more of lately is scrapbooking, yay!! I finally decided to just set up a card table in the living room when the kids go to bed and get to work. I've done it twice now in the last few weeks and I've gotten quite a bit done!

 I don't scrap in chronological order, I'm not that organized. I scrap as the pictures inspire me, or as I find them. So, this is why you'll see several LO's of my youngest from when he was a newborn.
 The other thing I've noticed is that lately, I've been gravitating towards more of an overall "collage" look with my LO's. I've not been matting each picture as I've done in the past and even have been layering pictures. I like how it looks, and I've noticed that things go MuCh faster this way for me.

 I used a felt coaster from Michael's in this LO. I cut in in half and then gave it a light coat of white paint. I like the dimensional look it adds. I've been trying to use more non-traditional scrapbook items in my LO's, it's fun to mix things up.

 I decided to be silly and use mustaches and a pencil to cover up names, etc. for privacy instead of blurring them out, 'cause I'm cool like that. Or, maybe because I couldn't figure out how to blur them on Picnik. I won't say which.
 I always am glad when I get back into creating, and scrapbooking is such a fun and instant gratification type of crafting for me.

 I don't scrap in chronological order, I'm not that organized. I scrap as the pictures inspire me, or as I find them. So, this is why you'll see several LO's of my youngest from when he was a newborn.
 The other thing I've noticed is that lately, I've been gravitating towards more of an overall "collage" look with my LO's. I've not been matting each picture as I've done in the past and even have been layering pictures. I like how it looks, and I've noticed that things go MuCh faster this way for me.
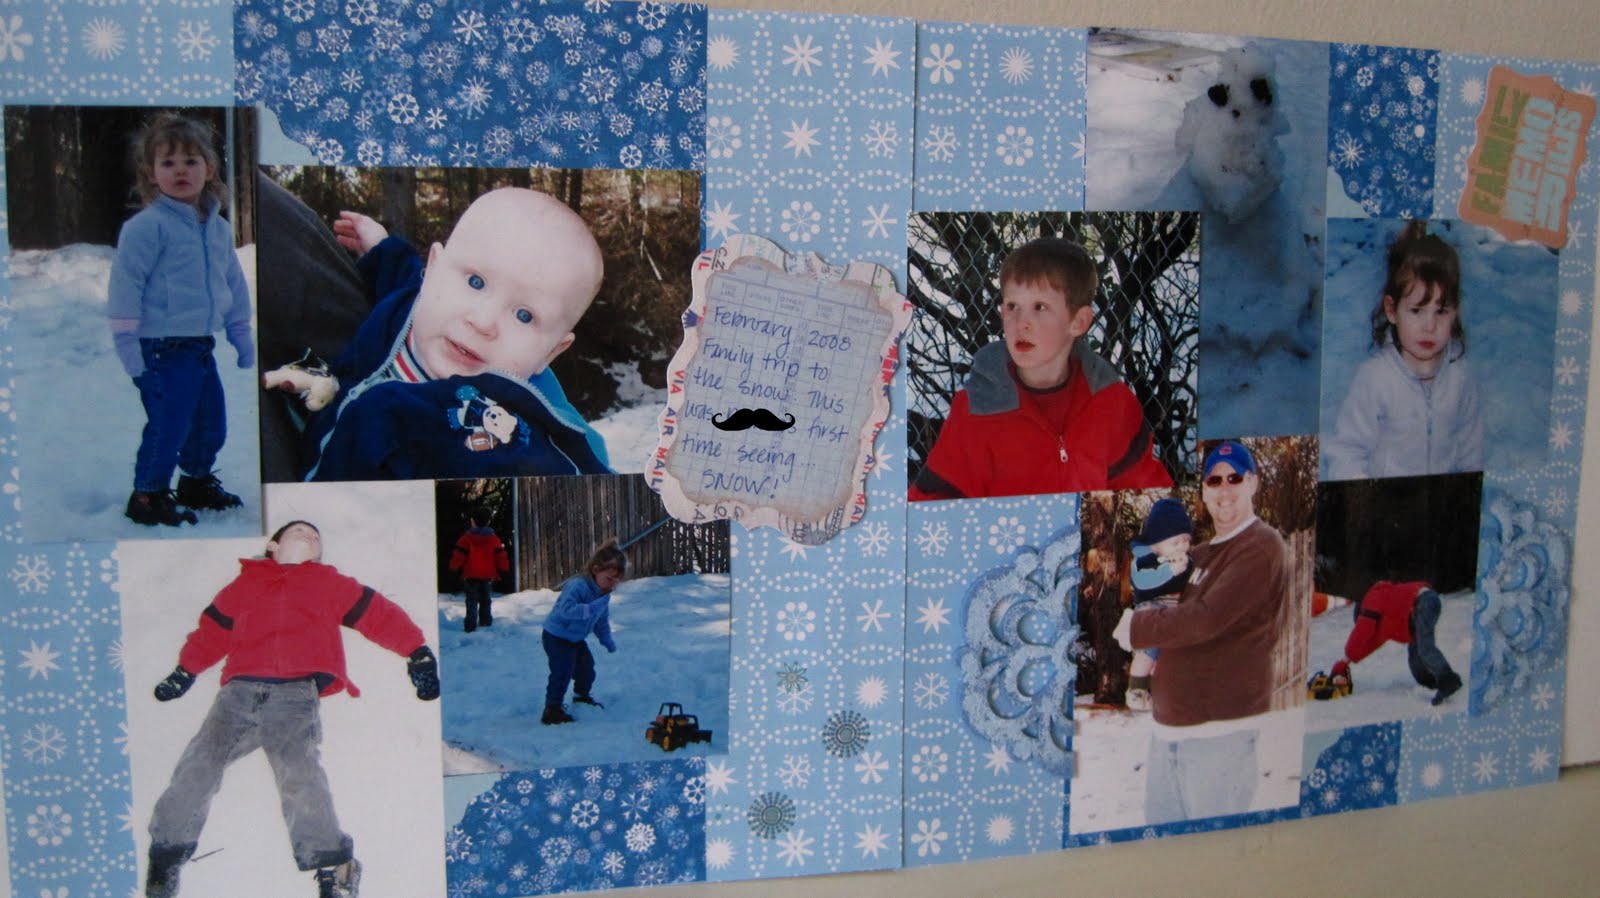 I used a felt coaster from Michael's in this LO. I cut in in half and then gave it a light coat of white paint. I like the dimensional look it adds. I've been trying to use more non-traditional scrapbook items in my LO's, it's fun to mix things up.
 I decided to be silly and use mustaches and a pencil to cover up names, etc. for privacy instead of blurring them out, 'cause I'm cool like that. Or, maybe because I couldn't figure out how to blur them on Picnik. I won't say which.
 I always am glad when I get back into creating, and scrapbooking is such a fun and instant gratification type of crafting for me.
 To those of you that scrapbook, what have you been working on lately?
Please check out "Linky Parties I Love" in the upper right hand corner to see where I'll be sharing.
Keep on scrappin' on, Ladies!
Saturday, December 11, 2010
Jesus is the Gift Ornaments
So this is the last of the ornaments that I'll be making for gifts this year.
 I love the message "Jesus is the gift", it's simple yet effective. I have another ornament that I made myself last year with the same sentiment, but wanted to make something this year for gift giving.
 I covered a wooden block with scrapbook paper, distressing the edges. Then I "wrapped" it with white ribbon. I typed the wording and printed them out, then I laminated them. Then they were hot glued to the front, along with the star. To make the top I just cut a small bit of gold glittery ribbon, glued it down and topped with a button.
 I love the message "Jesus is the gift", it's simple yet effective. I have another ornament that I made myself last year with the same sentiment, but wanted to make something this year for gift giving.
 I covered a wooden block with scrapbook paper, distressing the edges. Then I "wrapped" it with white ribbon. I typed the wording and printed them out, then I laminated them. Then they were hot glued to the front, along with the star. To make the top I just cut a small bit of gold glittery ribbon, glued it down and topped with a button.
 Please click on "Linky Parties I Love" to see where I'll be sharing.
Wednesday, December 1, 2010
Recycled Christmas Cards
My Mom is giving some gift cards as gifts this Christmas and wanted some nice cards to put them in. She has quite a good card stash, but didn't really like anything that she had. So I took two of her cards and some supplies and came up with these.
 Both cards are just standard greeting cards, one was a wedding card and the other a mother's day card. I purposely picked one's with solid background colors to make it easier to match papers.
You'll notice the above card has a lined envelope, because it had a weird logo printed inside. I just deconstructed the envelope and used scraps to line it and then glued it back together.
 I took some scrapbook paper and stickers she already had and made sure to cover everything well. I asked her to pick two bible verses to copy to the inside of the cards. I always appreciate a Christmas card with a verse inside.
 I took the same papers I used to make the cards and used a few scraps on the envelopes to help tie them in.
  This card has a cardboard embellishment that I cut out of the backing of a sticker pack. It also has a random thread I found that I thought matched nicely.
 I would say it probably took me 20 minutes for both, start to finish. I'm all about instant gratification. While I don't know if you'd want to undertake making all your cards this way it would be nice for those that you plan on giving gift cards too.
 Start saving those paper scraps and think of random bits and pieces that you could incorporate. This would be a great way to use up those odds and ends of things you've been saving from your scrapbook/papercrafting stash. Also start saving your used greeting cards and instead of tossing them...come on you know you do...reuse them instead!
Please click on "Linky Parties I Love" to see where I'll be sharing this idea. Thanks!
Wednesday, November 17, 2010
Clipboard Photo Holder
A cousin of my Hubby recently had her first baby, a girl. Baby's bedroom has lots of pastel accents and butterflies. I wanted to make something that could be used to display pictures in her daughters room. Since his cousin is a professional photographer, I figured there'd be lots of pictures. Just to be clear the photo I used below is of my daughter, just wanted to give an example of what it would like like with a picture displayed.
 This is what I came up with. I started with a pressboard sign from the dollar store as my base, and worked from there. Truth be told, the sign was in the giveaway box but I pulled it out and reused it to make this sign so I didn't end up buying a thing to make this but used what I had on hand. My kind of gift!!
 Here is what it looks like w/o a photo displayed. I spray painted the sides a light yellow and then mod podged two coordinating scrapbook papers as the base. I sealed it with gloss finish mod podge.
 The butterfly embellishment was originally for another project, but I repurposed it here instead. The flowers used to make the body were added on, they originally were scrapbook embellishments.

I layered three different silk flowers to make the large flower above. I like the rhinestone center and the glitter, adds just a touch of sparkle and compliments nicely with the iridescent beads from the butterfly on the opposite side.
 The "F" is is just scrapbooking chipboard, stacked and hot glued together. I used foam dots to float mount and reinforced with a bit of hot glue.
 This is what I came up with. I started with a pressboard sign from the dollar store as my base, and worked from there. Truth be told, the sign was in the giveaway box but I pulled it out and reused it to make this sign so I didn't end up buying a thing to make this but used what I had on hand. My kind of gift!!
 Here is what it looks like w/o a photo displayed. I spray painted the sides a light yellow and then mod podged two coordinating scrapbook papers as the base. I sealed it with gloss finish mod podge.
I decided to use a mini clip to mount the pictures so it would be easy to change them out. The mini-clip is another scrapbooking embellishment, from a package picked up at the dollar spot. The ribbon is wired for extra reinforcement and I already had it on hand, love how it compliments the colors so well.
 The butterfly embellishment was originally for another project, but I repurposed it here instead. The flowers used to make the body were added on, they originally were scrapbook embellishments.
I layered three different silk flowers to make the large flower above. I like the rhinestone center and the glitter, adds just a touch of sparkle and compliments nicely with the iridescent beads from the butterfly on the opposite side.
 The "F" is is just scrapbooking chipboard, stacked and hot glued together. I used foam dots to float mount and reinforced with a bit of hot glue.
Happy with the end result and I'm pretty sure the recipient will love it too. Perfect gift for a new Mom. Please click on "Linky Parties I Love" on the upper right to see where I'll be sharing this week.
Sunday, July 18, 2010
Scrapbook Weekend
I was able to go scrapbooking both Friday and Saturday this weekend! Between the two days, I completed thirty pages!! So excited. Here are some that I did.
 My First Two Wheeler
 Tag, You're It!
 "Goggles"
 "Aaargh, We're Pirates!"
 "Run 4 Fun"
 You are Loved
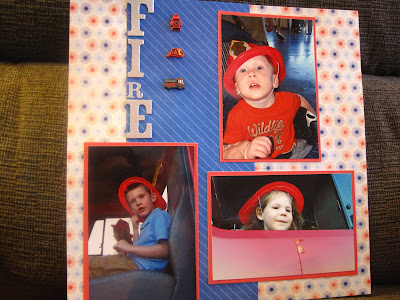 "Fire!"
 First MLB Game
 "Pool Party"
 My First Two Wheeler
 Tag, You're It!
 "Goggles"
 "Aaargh, We're Pirates!"
 "Run 4 Fun"
 You are Loved
 "Fire!"
 First MLB Game
 "Pool Party"
Please click on "Linky Parties I Love" to see where I'll be sharing my work.
Sunday, July 11, 2010
Lots of Layouts
I've been on quite a scrapbooking kick lately, and I'm loving it. I feel like I've finally made somewhat of a dent in my photo boxes (although I just ordered 544 more prints, yikes!!!). Anyhoo, here are some layouts that I've recently done. I'm not sure what is up with the blueish tint to them, my camera obviously wasn't liking the lighting.
 Pirate themed LO, #3 was sporting a pirate headband so I went with that.
 LO from a trip to a local children's museum, I tried to match the papers somewhat to the colors from the pictures.
 Oldest's 5th birthday. I used buttons to make the number 5 in the upper corner, although it's hard to tell from the photo angle.
 Bzzzzzzzzzzzz LO, number three was having fun in his honeybee costume.
 "Best Buds" LO with number one and three. They are really good friends, they love being together (or love fighting together).
 "Park Days" LO with number two. I had this beautiful floral tape that I wanted to use here, I really like how it looked against the solid paper.
 "Princess" LO. Number two loves dressing up as a princess, we have countless photos of her in dress up clothes. The "medallion" like embellishment in the bottom corner is actually a felt coaster that I dressed up.
 "All Together" LO. This is all three of the kiddos hanging out on the couch. Since number three was wearing a Hawaiian shirt, I decided to go with a beachy theme, explaining the palm tree papers. I LOVE the shot with all of their footsies! Don't you love how my cat snuck in the picture?
 Pirate themed LO, #3 was sporting a pirate headband so I went with that.
 LO from a trip to a local children's museum, I tried to match the papers somewhat to the colors from the pictures.
 Oldest's 5th birthday. I used buttons to make the number 5 in the upper corner, although it's hard to tell from the photo angle.
 Bzzzzzzzzzzzz LO, number three was having fun in his honeybee costume.
 "Best Buds" LO with number one and three. They are really good friends, they love being together (or love fighting together).
 "Park Days" LO with number two. I had this beautiful floral tape that I wanted to use here, I really like how it looked against the solid paper.
 "Princess" LO. Number two loves dressing up as a princess, we have countless photos of her in dress up clothes. The "medallion" like embellishment in the bottom corner is actually a felt coaster that I dressed up.
 "All Together" LO. This is all three of the kiddos hanging out on the couch. Since number three was wearing a Hawaiian shirt, I decided to go with a beachy theme, explaining the palm tree papers. I LOVE the shot with all of their footsies! Don't you love how my cat snuck in the picture?
I've finished quite a few more LO's, maybe I'll get around to posting some of those soon! Click on "Linky Parties I Love" to see where I'll be linking up.
Monday, May 17, 2010
Scrappin' The Holidays
Today as I was perusing through Joann's, I was looking at all the random doo-dads that they already had out for the 4th of July. I'm telling you, it seems stores are putting out holiday stuff earlier and earlier.
I wasn't planning on buying anything, but then I saw some really cute star shaped rhinestones in red, white and blue. There were about 25 or so in the package, and they came with the foam dots as well, for $1! I didn't know what I was going to use them for, but at that price I snagged 'em up. I realized on the way out to the car that they'd be perfect for embellishments on a patriotic scrapbook page.
 I've really been trying to think outside the box when buying for scrapbooking. I've started hunting around the notions department for ribbons, etc. I found several clearance ric racs and ribbons on sale for $0.25 a yard! I ended up getting several, they are really cute (but I'm too lazy to take a picture right now).
 I also buy things on clearance to use later on. The fun little glittery foam shapes in the "harvest" layout were in the kids section at Wal-Mart awhile back for less than a dollar a sheet. They weren't made specifically for scrapbooking, but you'd never know it.
 This Christmas LO was made with all clearance or markdown papers. There were a few different sets that I combined together to make it, they weren't all part of the same line. I even bought them at several different places. I was really happy with the overall result, and I'd say that the entire layout was under $0.50 to complete.
I wasn't planning on buying anything, but then I saw some really cute star shaped rhinestones in red, white and blue. There were about 25 or so in the package, and they came with the foam dots as well, for $1! I didn't know what I was going to use them for, but at that price I snagged 'em up. I realized on the way out to the car that they'd be perfect for embellishments on a patriotic scrapbook page.
 I've really been trying to think outside the box when buying for scrapbooking. I've started hunting around the notions department for ribbons, etc. I found several clearance ric racs and ribbons on sale for $0.25 a yard! I ended up getting several, they are really cute (but I'm too lazy to take a picture right now).
 I also buy things on clearance to use later on. The fun little glittery foam shapes in the "harvest" layout were in the kids section at Wal-Mart awhile back for less than a dollar a sheet. They weren't made specifically for scrapbooking, but you'd never know it.
 This Christmas LO was made with all clearance or markdown papers. There were a few different sets that I combined together to make it, they weren't all part of the same line. I even bought them at several different places. I was really happy with the overall result, and I'd say that the entire layout was under $0.50 to complete.
Scrapping holidays are always fun, they have such special memories attached to them. Remember to keep your eyes out while shopping for things to use to make your pages extra special. Remember, just because you don't need it right now doesn't mean you won't use it down the road. We all have lots of Thanksgiving, Easter and Christmas celebrations to look forward to.
Click on "Linky Parties I Love" on the right to see what awesome linky parties I'll be sharing my info with.
Wednesday, May 5, 2010
DIY Decorative Brads
So I've really been trying to get back into scrapbooking on a more consistent basis. Great because I'm getting things in my books. Bad because I'm staring to run out of supplies!
Now since I don't want to go and bust the bank I'm trying to start making more of my own scrapbook embellishments, since those seem to go the fastest. I had a box of plain brass brads from the office supply store, so I decided to start with them.
Numbers 1 and 2 are brads painted with acrylic paint and then given a top coat of clear nail polish. Think of all the possibilities here, how many of us have a ton of acrylic paint?!? Also, what if you added a layer of crackle medium between coats?
Number 3 is covered in sand. Now I just used sand from the sandbox out back, but what if you had special sand from a trip that you saved? What a great way to actually use it!
Number 4 is just covered in sparkly glitter. I gave it a quick coat with matte acrylic sealant to keep the glitter from falling off.
Number 5 is glitter glue. Simple as that.
Number 6 is a big pile of sequins.
Number 7 and 8 are sequin "flowers".
Number 9 is just a large sequin with a few small hearts glued on it. I only had a few of these floating around, great way to use up bits of this and that.
Numbers 10-13 are covered in....get ready for it......nail polish! Know how we've been paying for fancy "enameled" brads? That's what I made here, for nothing! I gave each a coat of clear nail polish to make them extra shiny. I am really excited about these, they look awesome.
Try making your own, I guarantee that you'll have fun customizing them for your needs. Plus, it's yet another way to truly make your LO your own.
Click "Linky Parties I Love" under "For Your Information" on the right to see where I'll be sharing my secrets.
Sunday, April 18, 2010
Time To Get Serious About...
scrapbooking. I took SO many pictures at Disneyland, I know it was around 200! Now all of them won't make the cut, but I still have quite a few to work with. I am so behind with my scrapbooking it's not even funny. It's yet another thing I wish I was more on top of, sigh.
So to get myself motivated to get going I've been flipping through the kids baby books. My daughter's has the most completed. The girl stuff is so much cuter, maybe that's why more of her book is done? Anyhoo, here are some pictures of completed LO's from her baby book.


So to get myself motivated to get going I've been flipping through the kids baby books. My daughter's has the most completed. The girl stuff is so much cuter, maybe that's why more of her book is done? Anyhoo, here are some pictures of completed LO's from her baby book.

DD and her big brother, various moments.

DD's first birthday.

DD's first 4th of July, she was only a month and half old. It was SOOO hot that day, I was worried she was going to get heat stroke so I sat in the shade with her as much as I could.

Various " first" milestones. This was a fun LO to do, all sorts of different things here.

One of my favorite pictures from her first year of life. Sitting out on the front lawn, I got this candid shot of her playing in the grass. WOW....I miss those days.
So now I just need to get going and get more done! I have more than enough pictures and supplies to do it, just need to park it and get started!
Linking up to:
Subscribe to:
Posts (Atom)


