Showing posts with label Designer Dollar Store. Show all posts

Saturday, November 5, 2011

The Dollar Store 1 Minute Necklace


I honestly don't even know if it would take you a whole minute even to make this, but you'll definitely want to try it!


 I started off with these hooks that I picked up from a garage sale for $0.25.  Yes, I know they technically didn't come from the dollar store.  However most of them carry decorative ornie hooks like these, so I'm sure you won't have trouble getting your hands on them.


You then just interlink them together, and before you know it you have a lovely little necklace!  Easy as pie, right?


These hooks were a lovely shade of gold, no paint necessary.  However it would be just as easy to spraypaint them whatever color you'd like, or you could even give them a spray of acrylic topcoat to add shine and prevent them from tarnishing.

Please click on "Linky Parties I Love" to see where I'll be sharing!

Wednesday, May 18, 2011

Barn Charm Birdhouse

I picked up a plain wooden birdhouse from the dollar bin at Joann's and transformed it to the above birdhouse. I think it's so cute, I am in love with barns and this reminds me of a birdie sized barn!

I took moss from the backyard, dried it out and glued it to the underside of the roof and in little clusters on top. The roof underneath is painted a russet brown and then has been given a light coat of metallic bronze glaze. The rims around the openings as well as the little perch have been painted olive green.

I also took some bronze colored flat glitter (not shiny) and sprinkled a bit on top here and there admist the moss. The wood is actually tanbark from the front yard planting beds! I just made sure to pick out pieces of wood that were strips to have them more closely resemble "planks".

The body of the barn is painted with a base coat of tapioca, then a coat of crackle glaze was applied. Once dried, I did a topcoat of oxide red and it dried to the lovely aged finished look. The base of the house as well as the roofline were painted complimentary shades of brown. I then used the same tanbark as I did on the roof to glue around the base of the house.


If my Momma likes it, it's hers. If not, I'll be keeping it for myself!


What do you think, does it look like a barn? I hope so! Please click on, "Linky Parties I Love" to see where I'll be sharing my latest project.

Saturday, March 19, 2011

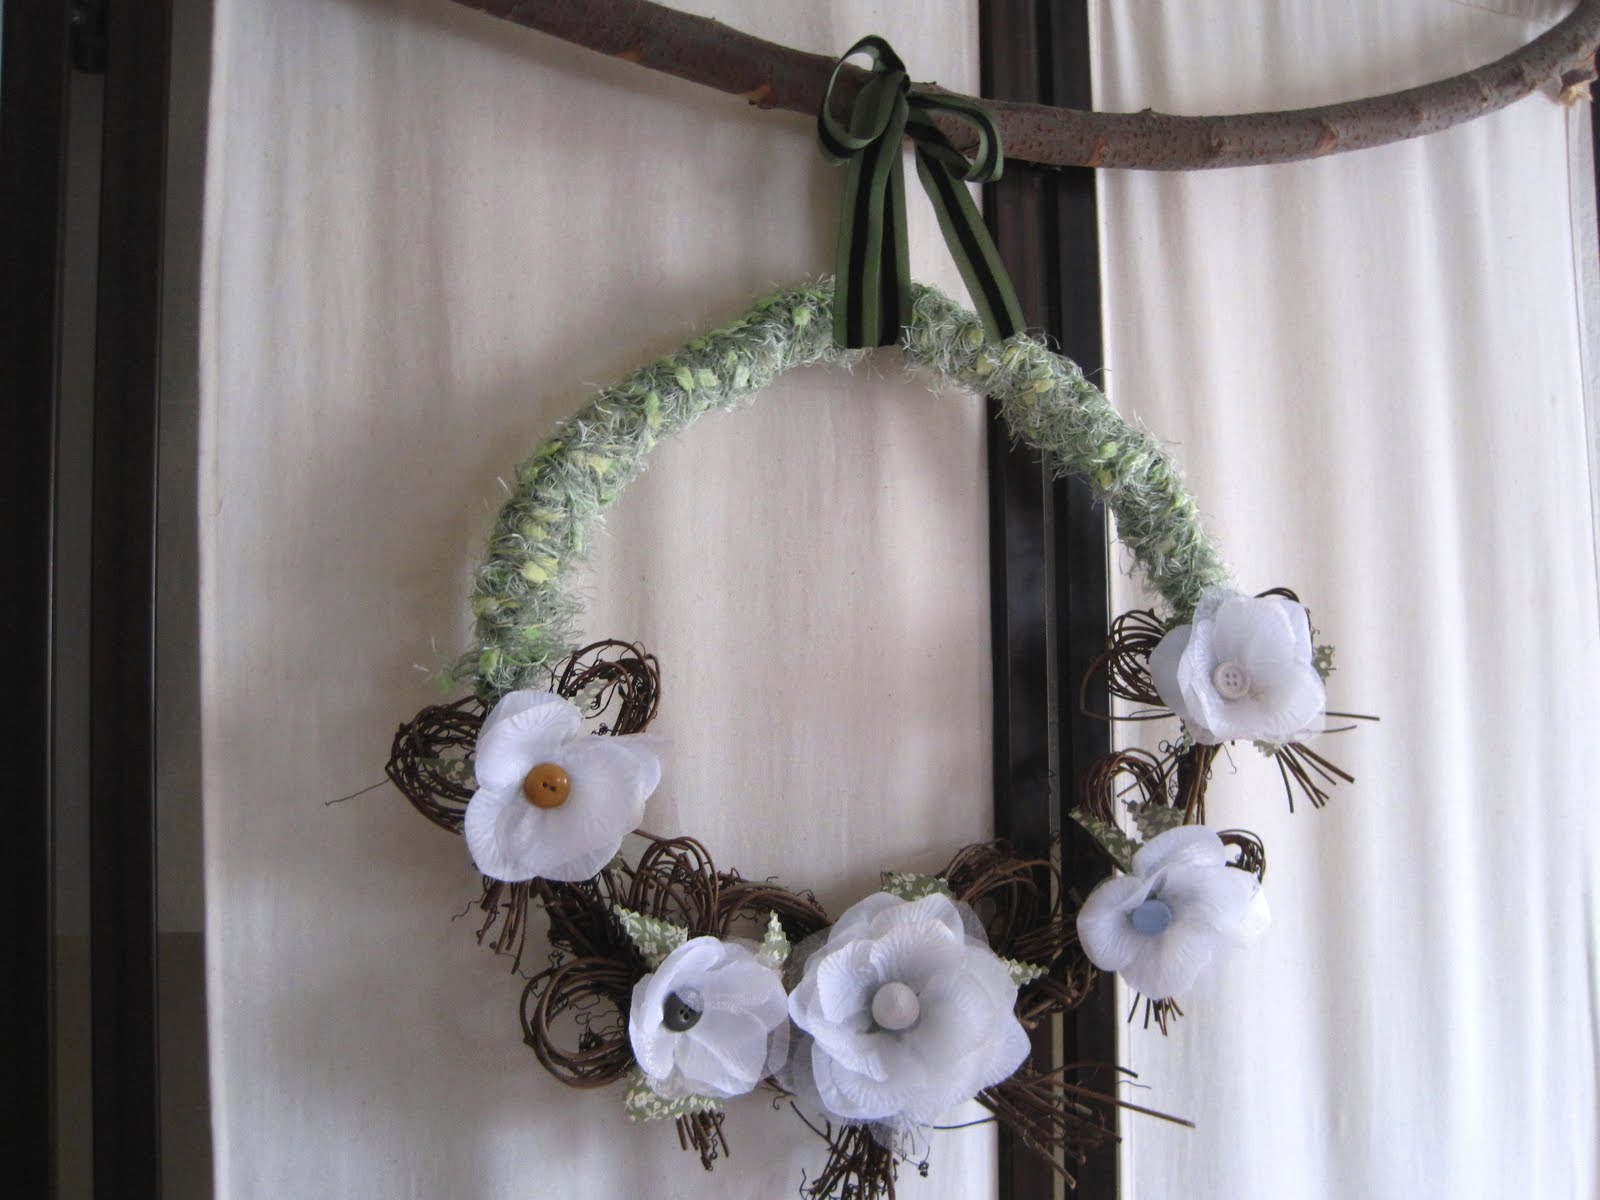
Floral Twig Wreath


I made the above wreath for spring a few days ago, not too shabby. I was semi inspired by a wreath I saw Kimba make over at A Soft Place To Land, you can go here to take a looksie at hers.

Pretty much most of the new materials I used came from the dollar store. I bought the petals, ribbon and yarn there. Everything else I already had on hand. Let me show you what I did.


I started with this wreath. Cute, way too many bows. So I snipped some off with my pruners (and saved them for another project). After my pruning, I ended up with the large one on the bottom and two on each side.

To make the large center flower I started with a metal lid from a juice container. I cut some vintage ribbon into "leaves" and glued them down. Then I stared with the flower petals, starting on the outside and working my way in. I used a button as the center for each flower.

This is what I ended up with when I was done with the flowers. Cute, no? I thought they were a bit too white, so I misted them with some diluted Tim Holtz distress ink that I put in a spray bottle. If you want to see what I'm talking about, watch my latest You Tube video here.

**On a side note, you can always watch any of my videos by clicking on my "vintage tv" link on my sidebar, all my videos are there on my You Tube channel. Ok, end of shameless plug**

I then used fluzzy (a combo of fluffy and fuzzy) green yarn purchased from the dollar store to wrap the top section of the wreath. I would have wrapped the entire thing, minus the bows, but it was almost impossible to get the yard in between those bows.

I used the green ribbon (also from the dollar store) as my hanger and I called it a day. I have it hanging over my couch. In retrospect, I would have used hot glue to attach everything so I could hang the wreath outdoors. But I didn't, so it's an indoor wreath instead.

Please click on "Linky Parties I Love" on my sidebar to see where I'll be linking up this project and to see lots of other sources of inspiration. Thanks!

Saturday, January 8, 2011

Picture Perfect Barrette Holder

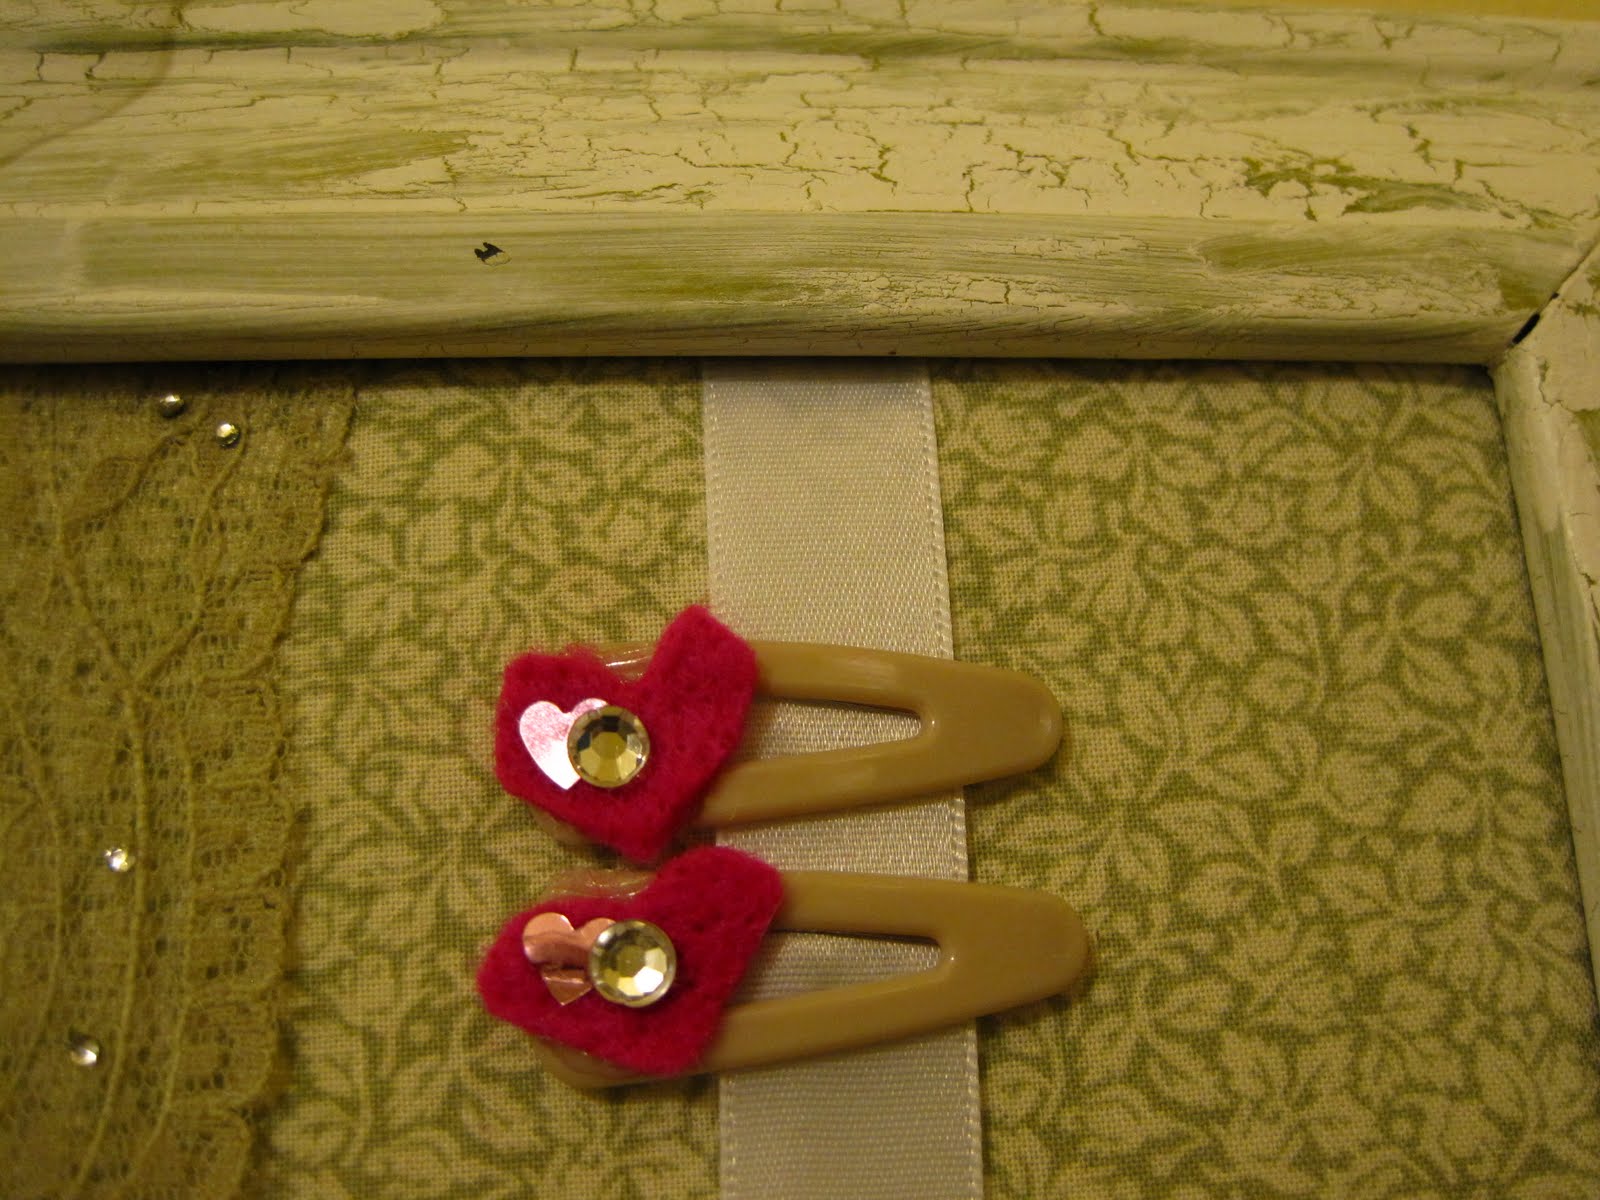
I made this for a little friend's birthday. She has many barrettes, but no place for them to call home. So after seeing all the cute barrette holders here and there in Blogland, I decided to make one. Here is the end result, not to shabby, right? Here's what I did.

I took a cheap black dollar store frame and gave it a basecoat of avocado green. I then used crackle medium followed by a coat of white paint. Then I gave it a light coating of matte sealant. I've never used the crackle medium before, that stuff is pretty cool. I can see lots of chippy stuff in my future.

I removed the glass completely, and then took the backer board and covered it with a layer of quilt batting. I then covered it with some green floral fabric and then chose three matching ribbons. After hot gluing everything in place I was pretty much done.

I decided to make a few quick barrettes to hang on the ribbons. I took some baby clippie barrettes from the dollar store and hot glued on some felt, followed by a few rhinestones. Easy, simple and pretty cute.

I took some sheer white ribbon and a bit of tulle and ran it through two eye screws I hot glued to the back of the frame as the hanger. That's it, very easy assembly actually. I am definitely making on of these for my daughter.

Please click on "Linky Parties I Love" to see where I'll be sharing this idea. Also linking up at this special "Celebrating Girls" month linky party here:
Keeping It Simple

And linking up for the first time at "fix it up friday" here:


What fun project do you have in the works?

Wednesday, November 17, 2010

Clipboard Photo Holder

A cousin of my Hubby recently had her first baby, a girl. Baby's bedroom has lots of pastel accents and butterflies. I wanted to make something that could be used to display pictures in her daughters room. Since his cousin is a professional photographer, I figured there'd be lots of pictures. Just to be clear the photo I used below is of my daughter, just wanted to give an example of what it would like like with a picture displayed.

This is what I came up with. I started with a pressboard sign from the dollar store as my base, and worked from there. Truth be told, the sign was in the giveaway box but I pulled it out and reused it to make this sign so I didn't end up buying a thing to make this but used what I had on hand. My kind of gift!!

Here is what it looks like w/o a photo displayed. I spray painted the sides a light yellow and then mod podged two coordinating scrapbook papers as the base. I sealed it with gloss finish mod podge.

I decided to use a mini clip to mount the pictures so it would be easy to change them out. The mini-clip is another scrapbooking embellishment, from a package picked up at the dollar spot. The ribbon is wired for extra reinforcement and I already had it on hand, love how it compliments the colors so well.

The butterfly embellishment was originally for another project, but I repurposed it here instead. The flowers used to make the body were added on, they originally were scrapbook embellishments.


I layered three different silk flowers to make the large flower above. I like the rhinestone center and the glitter, adds just a touch of sparkle and compliments nicely with the iridescent beads from the butterfly on the opposite side.


The "F" is is just scrapbooking chipboard, stacked and hot glued together. I used foam dots to float mount and reinforced with a bit of hot glue.

Happy with the end result and I'm pretty sure the recipient will love it too. Perfect gift for a new Mom. Please click on "Linky Parties I Love" on the upper right to see where I'll be sharing this week.

Wednesday, October 27, 2010

From Spangled to Stately

I love decorative stars. They really have a nice impact. I've been on the lookout for one for awhile now. Not finding one that I liked or could afford, I decided to try and make one instead. Here's my finished product, let me tell you what I did. Oh, and did I mention it cost me $0.50 to make?


Ok, this is the "spangled" thing I started off with. A cheapie plastic 4th of July decoration. It was discounted at the dollar store, so I got it for $0.50. It's pretty hideous, isn't it?


I hit it with some matte black primer. I didn't get super fancy perfect for plastic primer either, the regular stuff worked just fine and covered it well. Just needed a light coat.


I finished it off with Rustoleum's "brown" in their hammered finish. I really like this stuff. It goes on well and has a somewhat textured finish, as you can see below. It also gives your project just the right touch of metallic sheen.

There are a few places where the black primer just so faintly shows through. I only used two really light coats of the brown and like how the black is just showing through here and there, gives it some pop in my opinion.

So, not bad for $0.50, right? I had all the paint and the little bit of ribbon I used for hanging on hand. Looks great, made one for my Mom too and I'm hoping she'll like it as much as I do!

Please click on "Linky Parties I Love" to see where I'll be sharing my project.

Friday, October 22, 2010

Nature's Bounty Wreath

So, as you can see I found my camera, yipee!!! I put it back in a weird place. I need to have a dedicated spot for it so I don't have to go through that again, not fun.

So here's my latest project. I'm calling it "Nature's Bounty" wreath, like the title? I went to the dollar store yesterday and saw this wreath and this package of potpourri/filler stuff and immediately I thought it would make a great combo for a wreath. Let me show you what I did.

First off I primed the wreath and some of the decorative items. Everything in the bag was various shades of mud brown, so I wanted to vary it a bit. I used black primer (OSH brand) and did a light coat.

I used Rustoleum's hammered finish in "brown" for the wreath and some of the decorative items. I also painted a few of the items with some yellow and red spray paint I already had, but then lightly went over them with a coat of the hammered brown. I made sure the yellow and red faintly came through, not giving it a solid coat. The nuts I just covered with a very watered down glaze of metallic brown acrylic paint, for a barely there look.

To give the wreath some rigidity I took a plastic lunch meat container lid and hot glued it to the backside. I wanted to have a platform to help build off of and to have an area to glue to. I used the plastic lid as opposed to cardboard so it would stand up to the elements, as I don't have a covered porch.


Then I just started building the wreath. I wanted to cluster the items together and build it up instead of spreading it all over the wreath.


For the hanging ribbon, I used some brown ribbon and then tacked the gold sparkly ribbon to it with hot glue. I like how it turned out. Just a bit of glitz without taking away from the overall muted look.


Here's the view from my front porch. Very happy with the overall result. The wreath and all the decorative items were $2. I bought the primer and brown paint for $8, but only used a small portion of each so I have quite a bit left over for other projects. Both ribbons I already had as well, so I'm saying this wreath was well under $5 to make.

Please click on "Linky Parties I Love" to see where I'll be sharing my latest project!

Sunday, April 18, 2010

Quickie Swamp Cooler Cover Up

Before....

After! So much better!

Wallpaper hot glued directly to the side of the swamp cooler and a Dollar Tree vinyl decal is all I did. It's not perfect, but BY FAR better than looking at a yicky old swamp cooler, right?

Linking up to the following:
Keeping It Simple
Making
http://itssoverycheri.com/


DIY Day @ ASPTL
 http://linda-coastalcharm.blogspot.com/
<br />http://www.thethriftyhome.com
Creations by Kara
Decor Mamma

Friday, April 9, 2010

1 Pot 4 Ways

So I was trying to come up with an inexpensive but cute gift idea for a family member who loves to garden. I found plain plastic pots at the dollar store, they came in a 4 pack. You know the ones, they are terracotta colored and about 6" in diameter. I picked up a pack and brought them home with me.

I'm on a scrapbook paper kick lately, trying hard to come up with ways to use some of my huge stash up without actually scrapbooking (yeah..makes perfect sense, right?). So I had a bunch of scraps to use up, and started to play around with them on these pots and decided to go for it.

I present to you....one pot, four ways. I started by giving all of the pots a quick coat around their rims with paint. I didn't want to have to mess with trying to cover those with paper. I used Kilz in "Antique White", one quick coat and I didn't bother sanding, priming, or even giving it a complete coat. I was going with the "shabby" look.

Then each pot got a liberal coat of Mod Podge (I used gloss) followed by the scrapbook paper. I thought that strips would be the way to go as opposed to trying to cover the pot with a solid piece of paper. Definitely made it easier.

After giving each pot a coat of the same Mod Podge to seal it, I went to work on the embellishments. Jute rope, ribbon and silk flowers are what I ended up using. I waited until the pots were completely dry before decorating them. I used a hot glue gun to affix everything.

I really like how they all turned out the same, but different. I like how I rotated between two different papers on each pot, makes it a bit more fancy. However it would be cute to use all the same paper on one, I'm going to try that next time.

This project couldn't have been less expensive, especially if you have the tools on hand. Besides the $1 for the pots (well...$1.09 with tax) I didn't spend another dime and used things I already had. You could even get ultra creative and try to use pots you already have. Think black gallon nursery pots or metal cans (like coffee or from canned goods). Just make sure to add drainage holes if needed.

I put another smaller pot inside of the finished product. If the Mod Podge got really wet well then all bets are off. I still don't know if I'd trust it with a heavy coat of acryclic sealant. I also wouldn't use these outside either, but for indoor plants. They would be cute on a end table or in your kitchen window, if your so lucky to have one. Just don't forget the coasters!


Linking up to the following,
http://itssoverycheri.com/

Sunday, March 28, 2010

Polka Dot Piggy Bank

Found this little pink piggy bank at the Dollar Tree. Cute, but plain. My daughter and I went through my scrapbook paper scraps and punched a bunch of 1" circles. I am always trying to figure out how to use my paper scraps. We then Mod Podged them to the bank. Simple as that!

Fun, quick and easy craft to do together. The bank also has a plug on the bottom, so we don't have to break it to get to the booty.


Linking up to the following,

giveaways